Connect to virtual machine
Contents
For Linux: Create SSH Tunnel
Create SSH tunnel with the command below:
ssh -L port:127.10.0.0:remote_port -N -f -l vmconsole remote_ip -i path_of_your_private_key
You should have received a confirmation email when the order was completed, remote IP and remote port are included in the email. for eg, if your remote ip is: 10.2.248.253, remote port is 5900, your ssh key is in /home/user/id_rsa, you can create ssh tunnel as below:
ssh -L port:127.10.0.0:5900 -N -f -l vmconsole 10.2.248.253 -i /home/user/id_rsa
For Linux: Connect via vnc client
Connect to virtual machine with xvnc4viewer as below:
xvnc4viewer 127.0.0.1:remote_port
if your remote port is 5900, you can create as below:
xvnc4viewer 127.0.0.1:5900
For Windows: Create SSH Tunnel
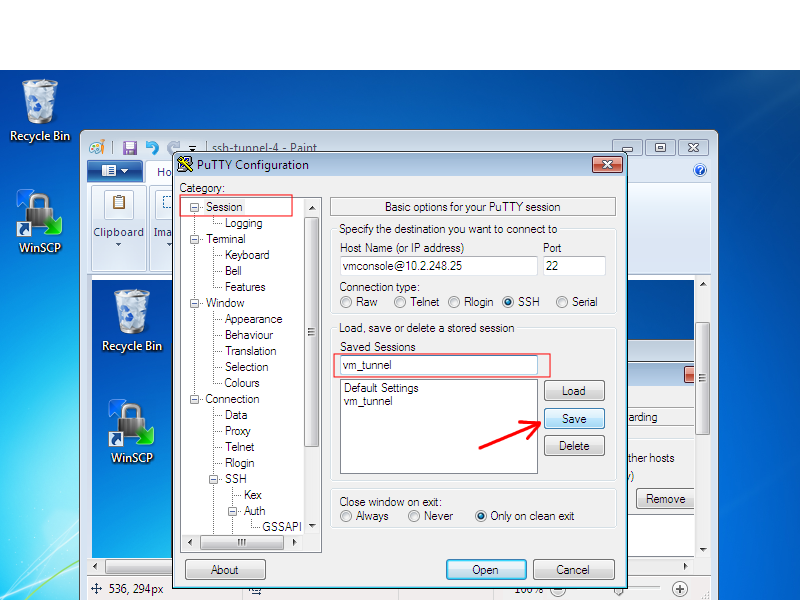
Specify remote Hostname.
You should have received a confirmation email when the order was completed, there is a remote IP included in the email,
for eg, if the remote IP is: 10.2.248.253, in host name, type in:
vmconsole@10.2.248.253
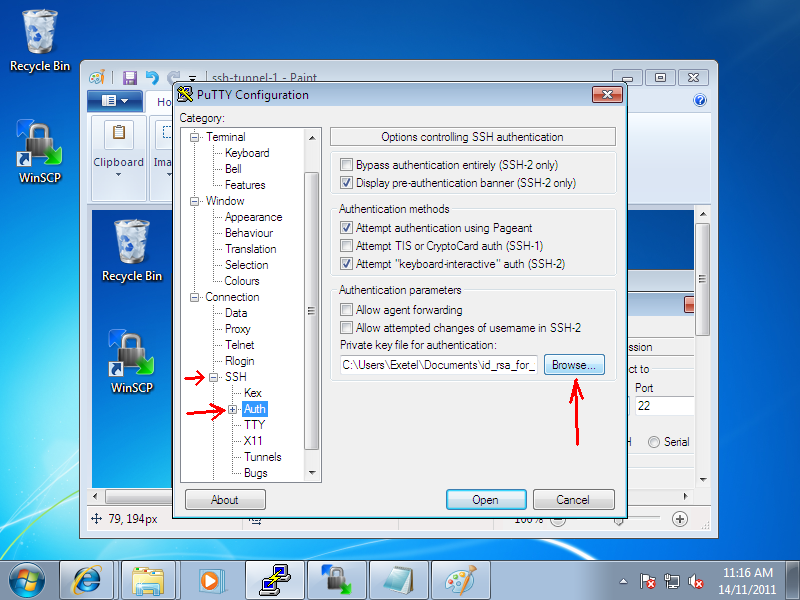
Select your private key
On the left hand side, click on SSH -> Auth, then click 'Browse' to select your private key.
If you are not sure what's a private key, please refer to [1]
Set up forwarding rule
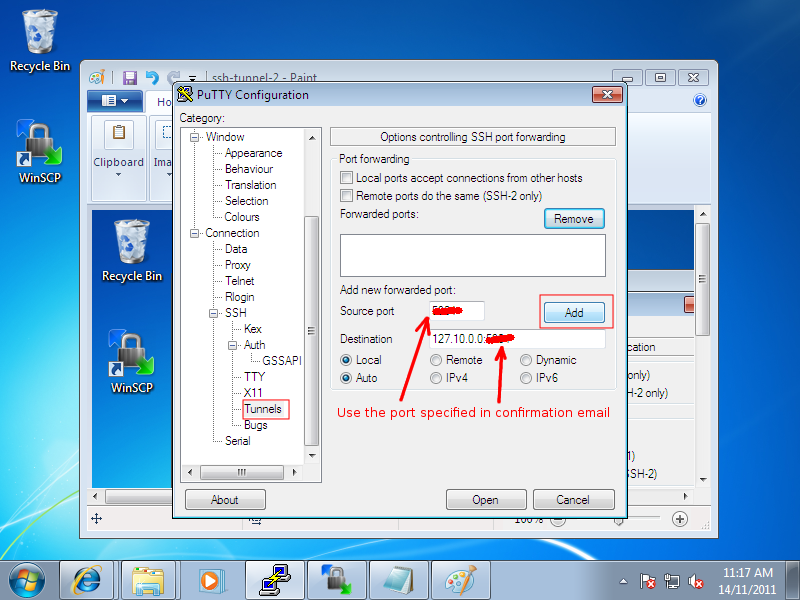
Click on SSH -> Auth -> Tunnels, then add rule as below.
Source port: remote_port
Destination: 127.10.0.0:remote_port
You should have received a confirmation email when the order was completed, there is a remote port included in the email, below will use port 5900 as an example:
(Please do NOT use 5900, use the port number you received in email)
Source port: 5900
Destination: 127.10.0.0:5900
Then click on Add
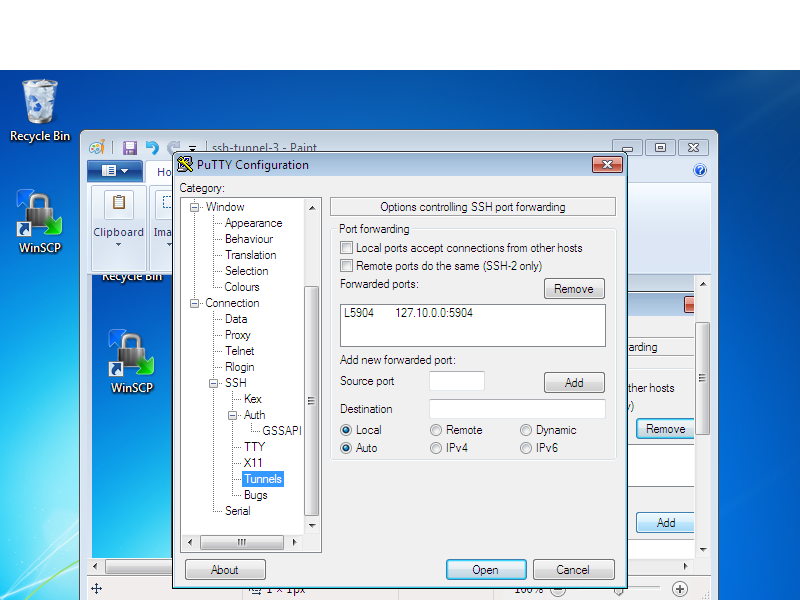
Once added, you should have a rule as below
Save your settings
Go back to 'Session' on the left, name your session(vm_tunnel is the name in the example), then 'Save'.
Connect
Click on "Open" to connect, Type in your pass phrase, there is a warning message 'Server refused to allocate pty', you can ignore this warning message, if you really want to get rid of this warning message. Please see step 1.6.
For Windows: Connect via vnc client
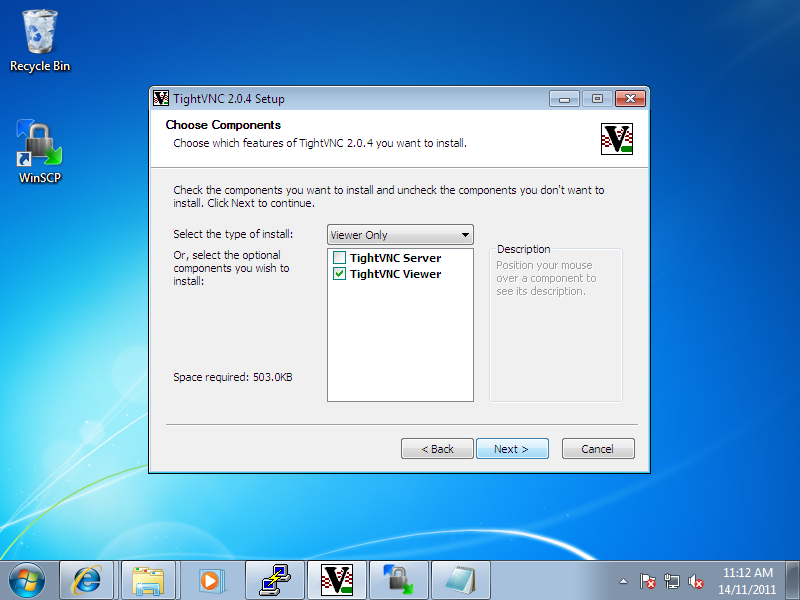
Install a vnc client
In the example below, we are installing real TightVNC, you will only need to install vnc client.
Connect
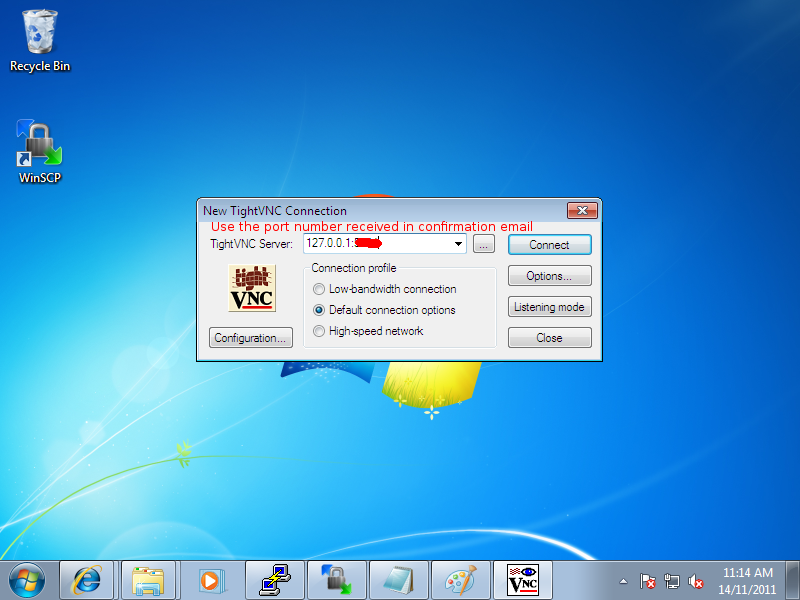
Connect -> 127.0.0.1:5900
(Please do NOT use 5900, use the port number you received in email)

