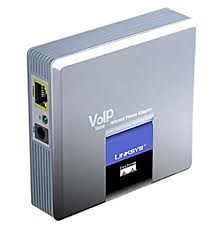
How to Setup VoIP on Linksys SPA - 3000 ATA
How to Connect the Device?
Sipura phone adapter has one RJ-45 connector, two RJ-11 connectors and a power-supply jack. Connect the RJ-45 input to the network you are using. The first RJ-11 input labelled ‘Phone’ has to be connected to a regular PSTN phone and the second RJ-11 input labelled ‘Line’ is to be connected to a regular PSTN phone line (if you do not plan to use regular phone line you can escape this step). The power-supply jack has to be connected to the electrical network. If everything is properly connected, the green light must be blinking.
Configuration of the VoIP
The basic network settings have to be done via the phone. For other adjustments, you can use the Sipura adapter web interface.
To enter the Sipura Configuration Menu you have to press the Star button four times (* * * *).
Dial Action
- Enter Menu
Explanation: when you hear ‘Sipura configuration menu’ press option followed by the pound key or hang up.
100# Check DHCP
Explanation: you will hear whether your DHCP is enabled or disabled.
101# Set DHCP -> to disable press ‘0’ and to enable press ‘1’
Explanation: press option followed by the pound key.
110# Check IP address
Explanation: press option followed by the pound key.
111# Set IP address -> enter the IP address using phone’s keypad numbers and * (star) for decimal point.
Explanation: enter the IP address followed by #. If DHCP is disabled you will hear ‘Invalid Option’.
120# Check Network Mask
Explanation: press option followed by the pound key.
121# Set Network Mask -> enter network mask using phone’s keypad numbers and * (star) for decimal point.
Enter network mask followed by #. If DHCP is disabled you will hear ‘Invalid Option’
130# Check Gateway
Explanation: Enter option followed by pound key
131# Set Gateway -> enter the gateway address using phone’s keypad numbers and * (star) for decimal point.
Explanation: Enter the gateway address followed by #. If DHCP is disabled you will hear ‘Invalid Option’
If you have DHCP you can just check the Sipura’s IP address from the Configuration Menu with 110#. When you have the IP address you can make all further adjustments from the web interface. The URL will be http://IP_address/
