Difference between revisions of "TP-LINK- TD- 8810 User Guide"
(Created page with "File:Tp1.jpg '''LED's in the Front Panel''' ---- The front panel of ADSL Router includes one power indicator (RED) and seven function indicators(GREEN), as explained in c...") |
(No difference)
|
Latest revision as of 03:53, 2 October 2013
LED's in the Front Panel
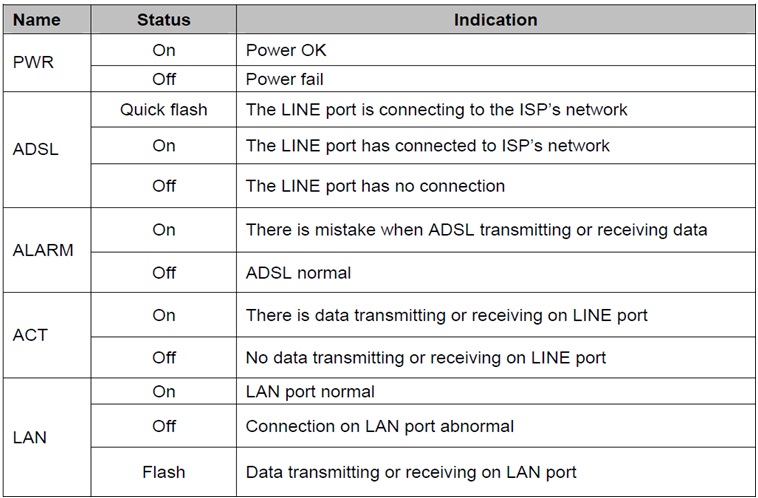
The front panel of ADSL Router includes one power indicator (RED) and seven function indicators(GREEN), as explained in chart below:
Rear-panel
- ON/OFF: Turn on/off the ADSL Router’s power.
- Power (9V~0.8A input): Please use the provided power adaptor, otherwise may cause damage to the ADSL Router.
- RESET (reset default): First press the reset button of Router, and then turn on the Router’s power for at least three seconds. It will resume the default manufacturer’s setup.
- LAN: Connect with your computer’s NIC.
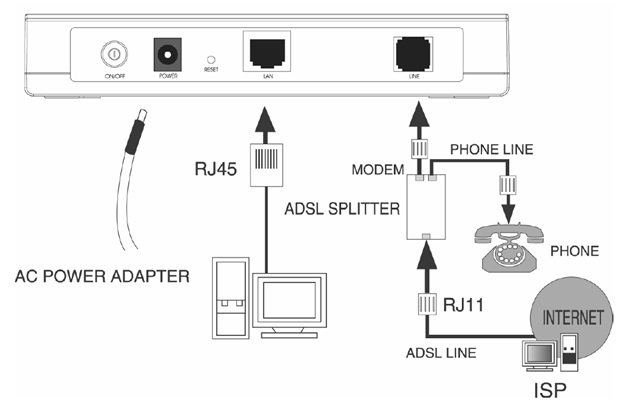
- LINE (WAN): Connect to the MODEM Port of Splitter or Connect with the telephone line.
Hardware installation procedures
The procedure to install the Router can be described in general terms in the following steps:
Step 1: Connecting the MODEM port of Splitter with the TD-8810 ADSL Router LINE port with a telephone cable. While you need to use a telephone, please attach telephone line into the phone port in the Splitter.
Step 2: Connect category 5 cable with RJ45 jacks to the ADSL Router’s LAN port and your computer’s Network Card.
Step 3: Plug one end of the AC Power Adapter into the Power jack on the ADSL2+ Router and the other end to a standard electrical outlet.
Step 4: Check the line connection to see if everything is ready. Power up finally.
Quick Installation Guide
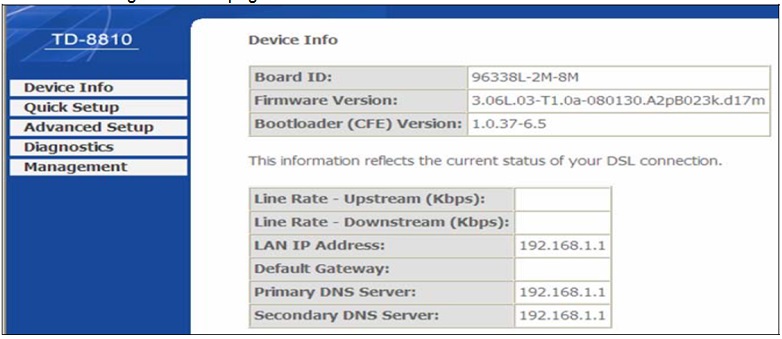
1. Start up Internet Explorer, and enter 192.168.1.1; then enter default user name(admin) 、password(admin), When ADSL connection is OK,
2. Click on the 'Quick Setup' from the left panel.
3. Enter the VPI and VCI values provided by your ISP, Leave the 'Enable Quality Of Service' unchecked and click Next.
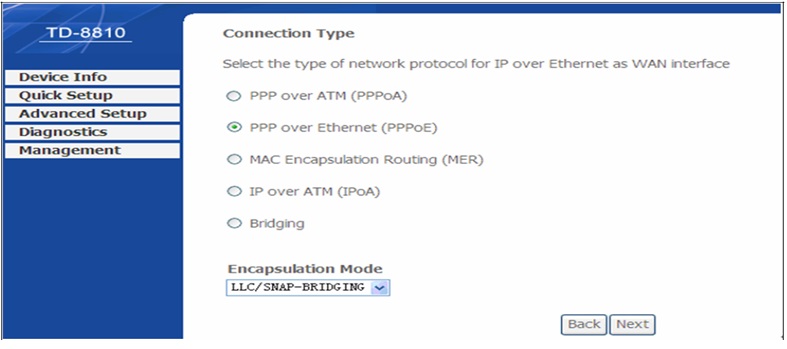
4. Select the 'Connection Type' and PPP Over Ethernet(PPPoE) and 'Encapsulation mode' as 'LLC/SNAP-BRIGDGING' and click on Next.
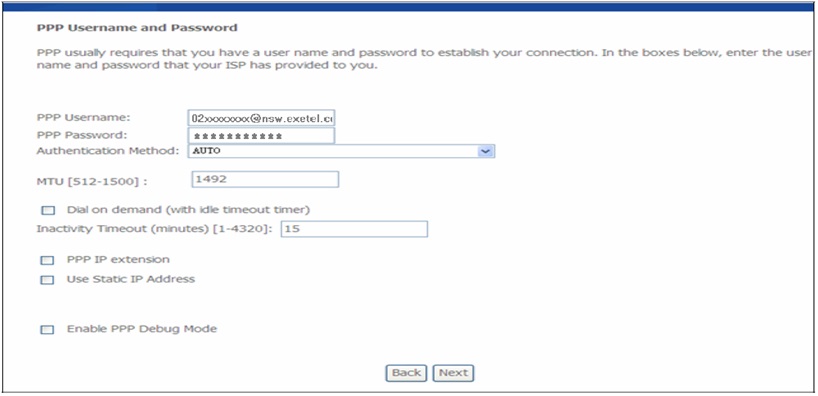
5. Enter the Username and Password provided by Exetel and click Next.
6. Click Save/Reboot.
Prepared by : SteveJ

